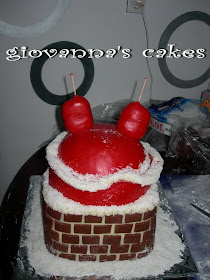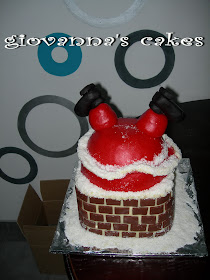
Christmas is just around the corner!!!!
This is a cake that I have also done last year. It's design was inspired by a cupcake that I have seen on the web decorated similar to this. So I though to myself, why not make it into a cake.
People liked it a lot and I am now beginning to get repetitive requests for it.
Last year I was not blogging at that time, so I am posting it now.
Also, for all of you out there that read me, here comes a picture step by step "tutorial".
Hope you enjoy it!


and the finished cake ...

SUPERB....UNDE AI INVATAT TU SA FACI ASEMENEA BUNATATI? BUNA IDEE DE TORT PT CRACIU, FUNNY...SA VAD POATE O SA MA INCUMET SA-L FAC, MAI ALES CA NE-AI ARATAT SI PASII...NU PARE FOARTE COMPLICAT. DAR TORTU IN SINE CE ESTE? AR MERGE SA FAC DIPLOMAT?
ReplyDeleteAM INCEPUT UN CURS , AM SA INVAT SA DECOREZ TORTURI....POATE DUPA CE-L GAT FAC SI EU ASEMENEA MINUNATII CA SI TINE... TE PUP!
autodidact totul. incercand am descoperit chestii de fiecare data. inca m-ai invat si dupa 200 de torturi facute. am vazut ca ai inceput cursul . bravo tie. eu nu am facut, oricum la noi aici in ro nu cred ca sunt astfel de cursuri.
ReplyDeletediplomatul nu este tocmai indicat, dar merge. eu am mai facut stil diplomat. unica chestie sa nu uiti s apui bete de sustinere in primul strat. altfel cel de al doilea ti-l va prabusi pe primul.
si asta am invata-o facand torturi:)am avzut ca se lasa primul strat de la greutatea celuilat si m-am tot gandit ce sa pun. am citi pe net, se numesc wooden dowels, dar eu folosesc paiele de baut suc, cu mare succes.
spor la treaba
merci mult,da am vazut si eu tot felu,internetu ii si la mine baza, dar am vrut sa invat cat mai profesionist, de aceea am ales sa fac cursul, si ii diferit cand cineva iti arata si-ti spune exact cum sa faci...dar totusi sunt putine 2 ore ..in 8 ore acopar primu nivel...am sa ma interesez daca mai sunt si alte cursuri .te pup si spor la torturi:)
ReplyDeleteQUE ENVIDIA ME DAS... tu creatividad esta tan viva!.
ReplyDeletemuchas gracias por el tutorial, es estupendo.
eres un pedazo de artista!!!!
BESOS
Pili
Thanks for showing us step by step how to assemble it. I love it!!
ReplyDeleteRaychel
Gracias por este paso a paso..
ReplyDeleteFelicidades